
Thursday, January 31, 2013
Installing the new motor
Sunday, January 27, 2013
Motor assembly ready to be fitted

Tuesday, January 22, 2013
Alignin the motor plate

Saturday, January 19, 2013
Fixing plate for ME1003

The next thing to do will be to align the plate accurately with the gearbox shaft. I will soon know whether it is a tricky or a simple task.
The rest of the motor plate

Thursday, January 10, 2013
Mounting plate half way done

The ME1003 has imperial threads on its fixing points, so I'll need to find suitable imperial bolts which is not easy in Finland.
Monday, January 7, 2013
Mounting plate for the electric motor

Saturday, January 5, 2013
Motor with flywheel
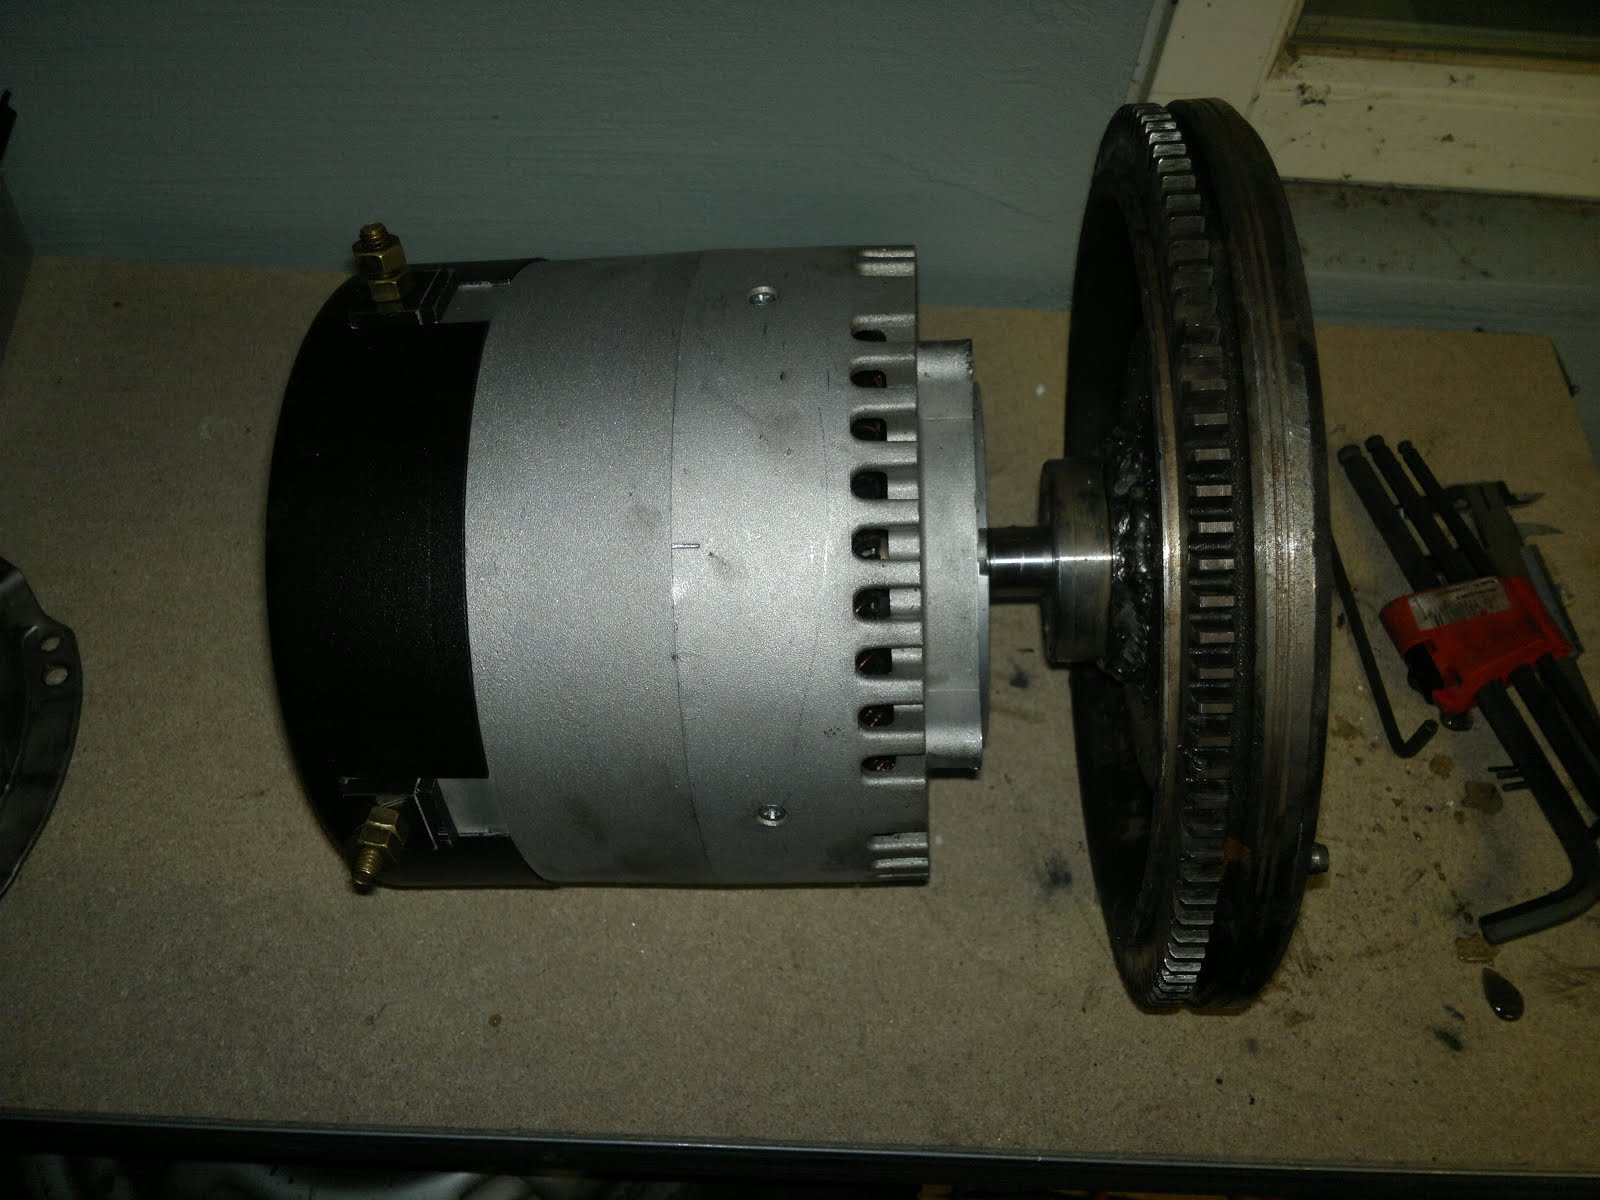
Fixing the flywheel

Thursday, January 3, 2013
Motenergy ME1003 48V power curve

Corolla's new motor arrived

Wednesday, January 2, 2013
Lifting off the original power source

Making room for the electric motor

Tuesday, January 1, 2013
Corolla in its new home

Subscribe to:
Posts (Atom)